
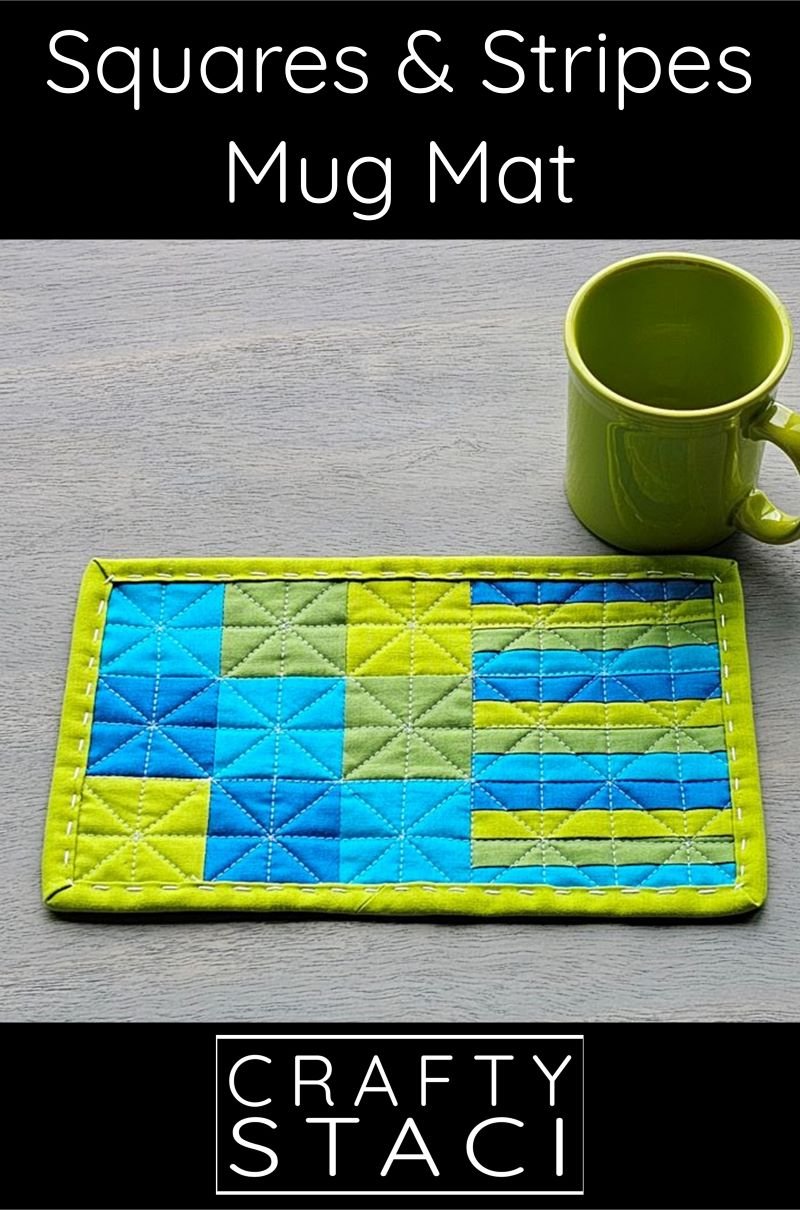
Make this quilted mug mat in no time, and use up some of those fabric scraps!
I’ve been sharing tutorials on my blog for over a decade, and I’m frequently asked how they can be printed or saved. The answer is here! You can find this printable tutorial in my shop, which contains the instructions, color photos, and templates from the original blog post, without the extra things you don’t need to make the project. The file is in PDF format, so you can either print or save it to your computer.
I originally made this little mat to include in my daughter’s gift box to take to college. The dorm she moved into was only a couple of years old, so I thought the furniture deserved a little protection from her tea cups.
To make this mug mat you’ll need:
cotton fabric in two or more colors and/or prints
batting
perle cotton, size 8 (optional)

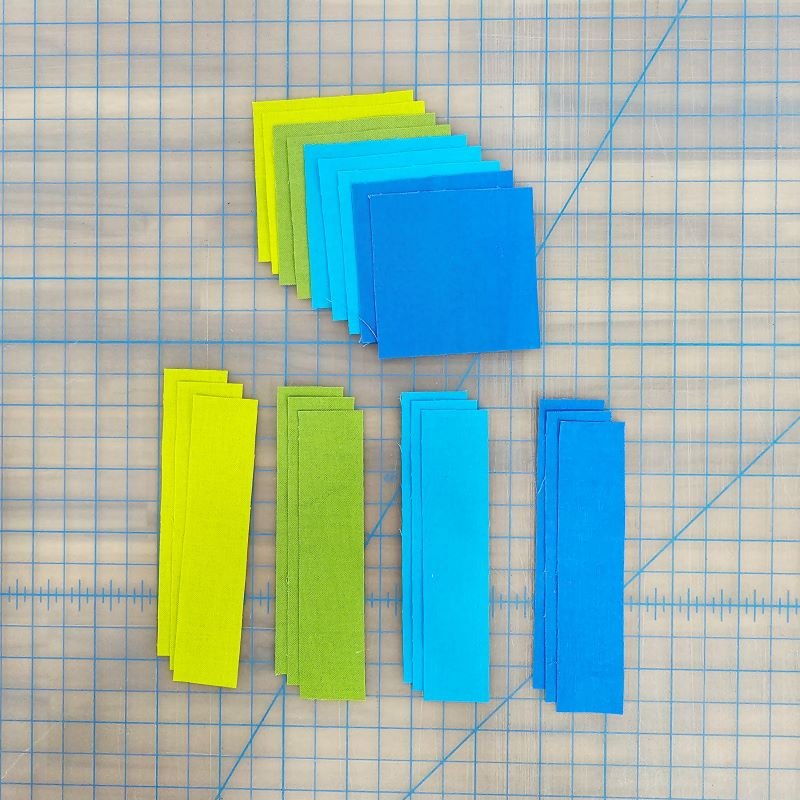
I’ll let you decide how many different fabrics you’d like to use. In total, you need the following cut pieces:
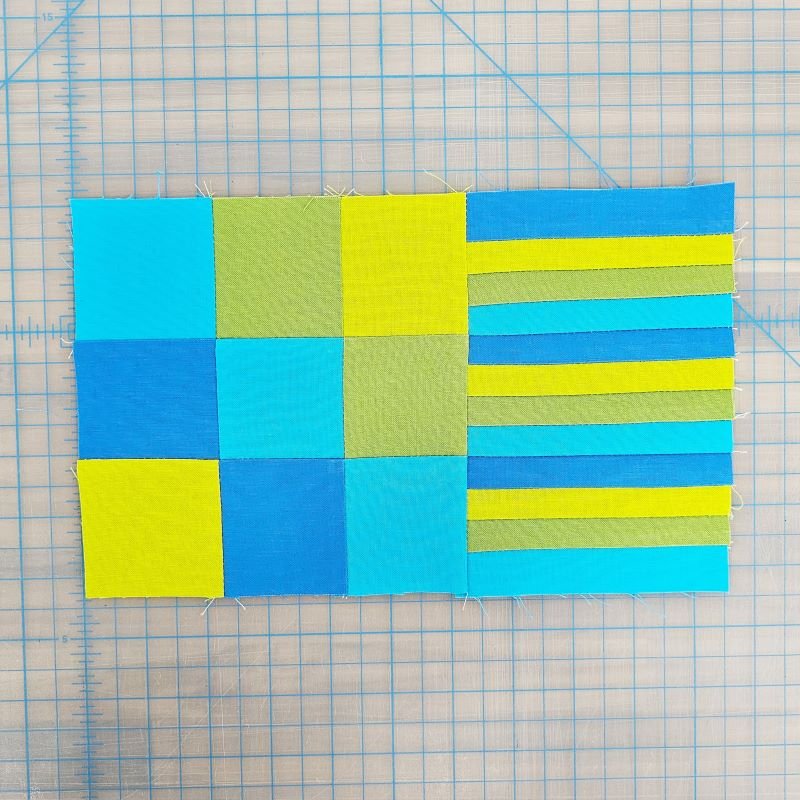
(9) 2 1/2” x 2 1/2” (squares)
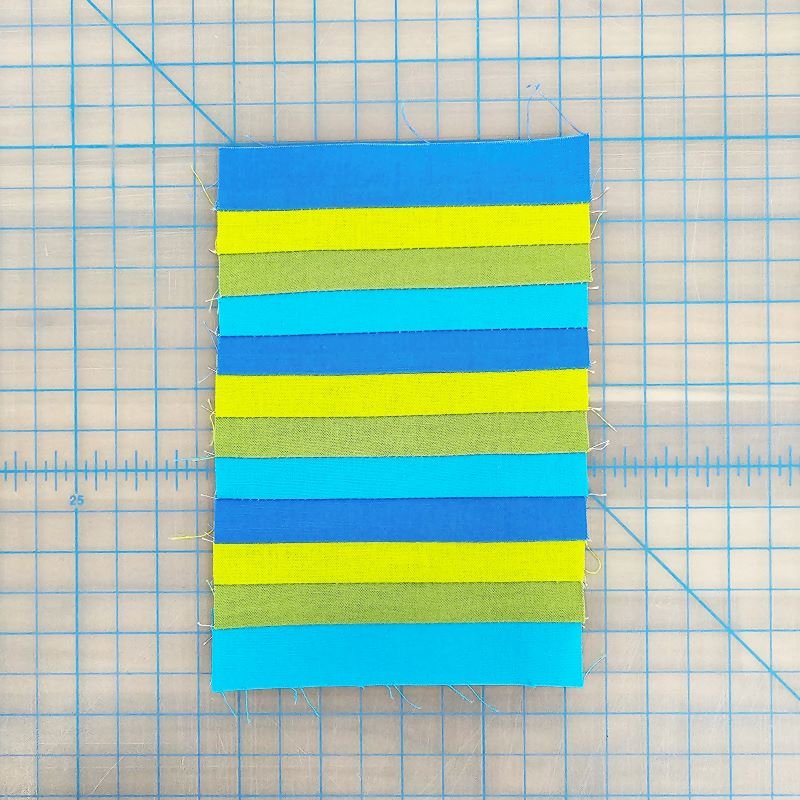
(12) 1” x 4 1/2” (stripes)
(1) 7” x 11” (backing)
(1) 2 1/2” x width of fabric (binding)
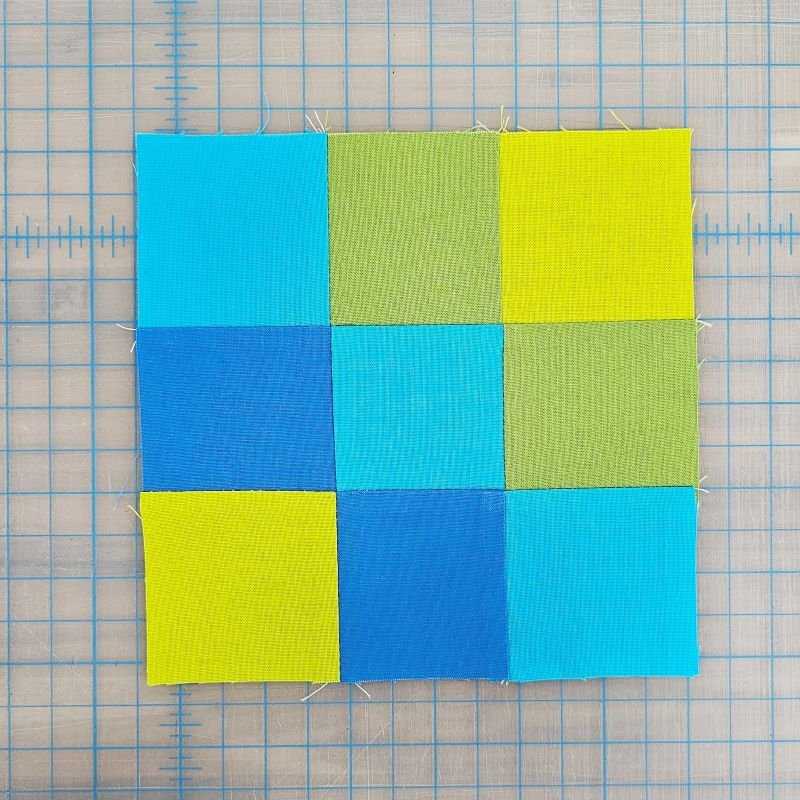
Lay out the squares and stripes in your desired pattern.

Sew the squares into (3) horizontal rows. Press the seams in the top and bottom rows to the left and the middle row to the right.

Sew the (3) rows together, nesting the seams. Press the seams toward the bottom.
Sew the stripes together in pairs. Press the seams toward the top.

Sew the pairs together, again in pairs, to create (3) units. Press the seams toward the top.

Sew the (3) units together. Press the seams toward the top.
Sew the squares unit to the stripes unit, nesting the seams. Press the seam toward the squares.
Lay out the backing, right side down. I pieced together more of my scraps and cut a piece from that the size of the backing (7” x 11”).

Lay the batting on top of the backing. Place the squares and stripes top over the batting, right side up.

Pin the layers. Quilt as desired.
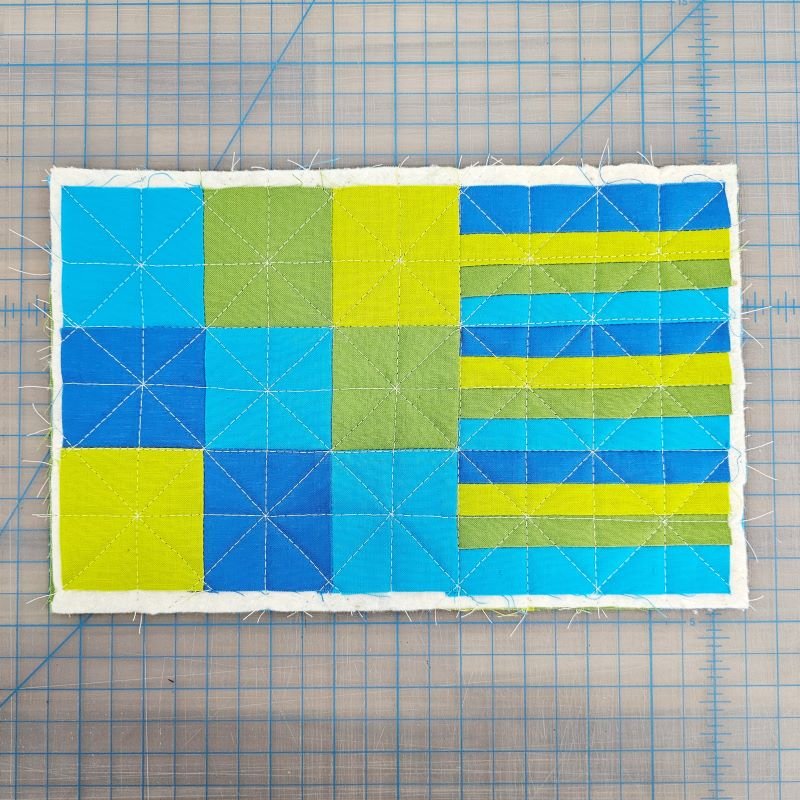
Trim the batting and backing even with the top. It should measure about 6” x 10”.
Trim the selvages from the binding strip. Fold in half with wrong sides together and press.

Sew the binding around 1/4” from the edge on the back, using your favorite method to join the ends.
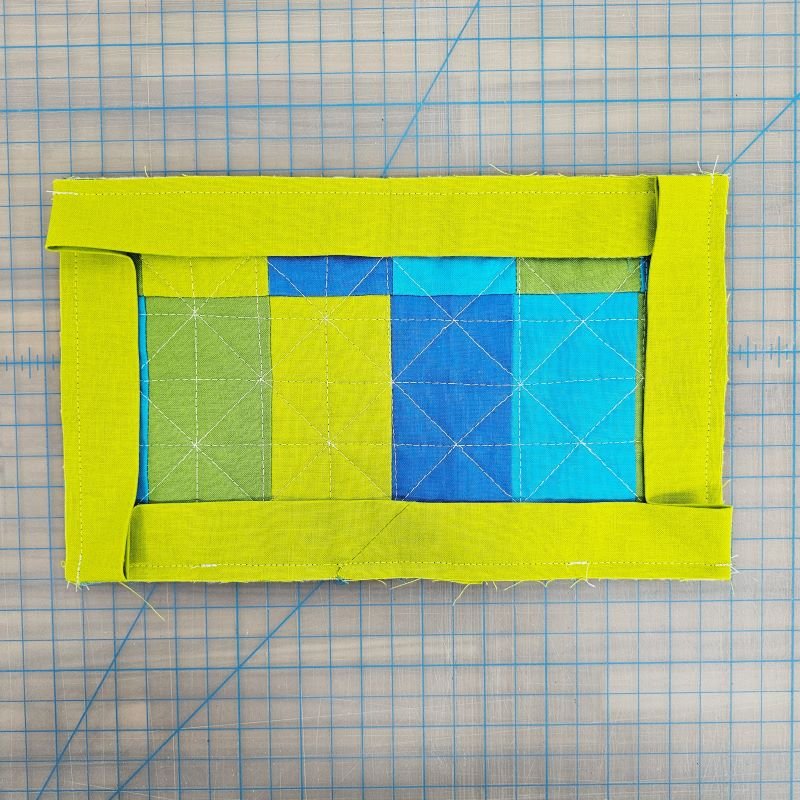
Wrap the binding around to the front and clip in place.

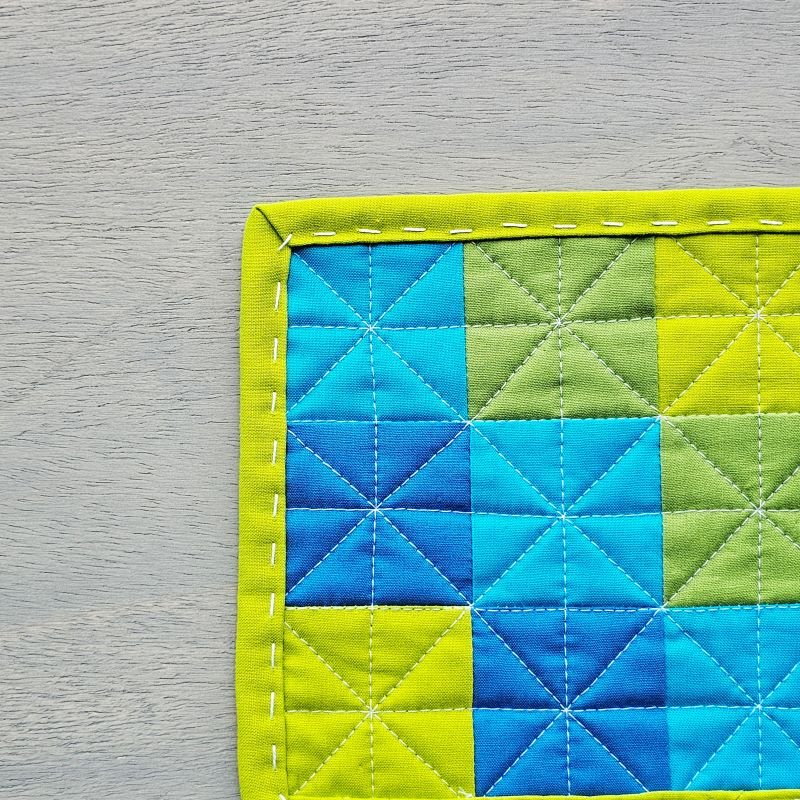
Stitch the binding in place by hand or machine. I used size 8 perle cotton and a big hand stitch.
Now all you need is your favorite mug!

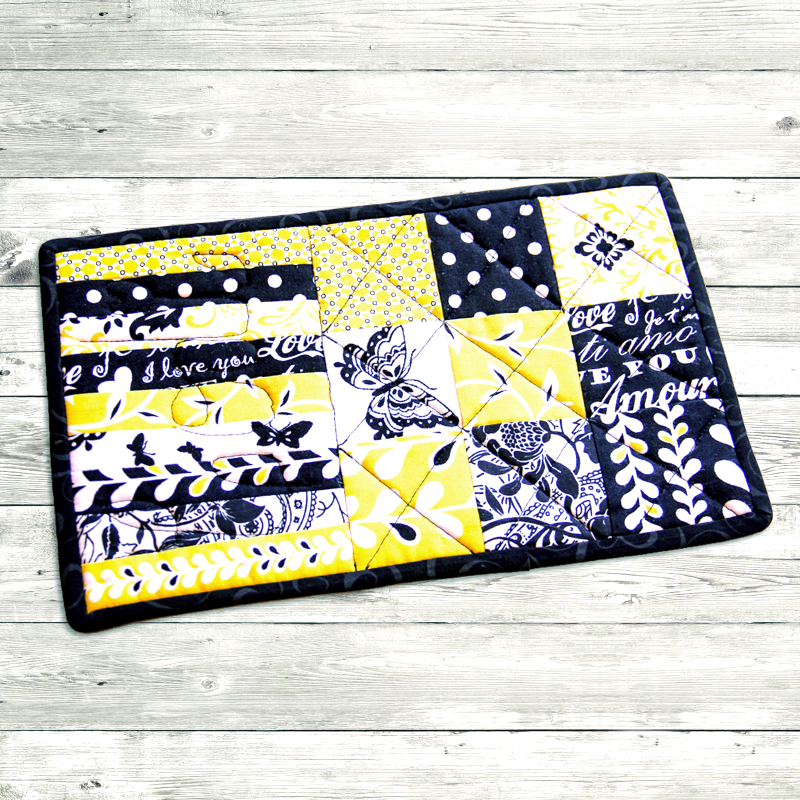
I also made one in red, white (it’s actually a very light grey), and blue to fit the season.

Make one to match every mug!


